Appearance
Redis SpringBoot集成Redis
本文介绍如何在SpringBoot程序中连接Redis并操作数据。
1. Jedis与Lettuce
Jedis 和 Lettuce 是 Java 生态系统中两个非常流行的 Redis 客户端库,它们都允许 Java 应用程序与 Redis 服务器进行交互。
1.1 Jedis
Jedis 是一款简单、易用的 Redis 客户端,它的设计目标是尽可能地与 Redis 协议保持一致,提供直观的 API。
连接模型
同步阻塞:Jedis 采用同步阻塞 I/O 模型,这意味着一个 Jedis 连接在执行命令时会阻塞当前线程,直到命令执行完成并返回结果。
非线程安全:单个 Jedis 连接不是线程安全的,如果在多线程环境中使用 Jedis,每个线程需要获取独立的 Jedis 实例,或者使用连接池
JedisPool来管理和复用连接。JedisPool是线程安全的,它会为每个请求提供一个 Jedis 实例,用完后归还给连接池。
优点
- API 简单直观,易于上手。
- 性能良好,在单线程或连接池管理良好的多线程环境下表现出色。
缺点
- 同步阻塞模型在处理大量并发连接时,可能导致线程阻塞,增加线程开销。
- 不直接支持异步编程模型(如 Java 8 的
CompletableFuture)。 - 对 Netty 等 NIO 框架的特性支持不直接。
1.2 Lettuce
Lettuce 是一款高级、可伸缩的 Redis 客户端,旨在提供同步、异步和响应式(Reactive)API。它利用 Netty 框架实现非阻塞 I/O,以提高并发性能。
连接模型
异步非阻塞:Lettuce 基于 Netty 框架,使用异步非阻塞 I/O 模型。这意味着一个连接可以同时处理多个命令,而不会阻塞调用线程。命令的执行结果通过
CompletableFuture(Java 8+) 或响应式流 (Reactive Streams) 返回。线程安全:Lettuce 的连接是线程安全的。多个线程可以共享同一个 Lettuce 连接实例,从而减少连接数和资源消耗。
连接多路复用:Lettuce 能够在一个或少数几个连接上多路复用多个命令,提高网络效率。
优点
- 高性能和可伸缩性: 由于其异步非阻塞 I/O 模型和 Netty 的支持,在处理高并发场景时表现出色,尤其是在 Spring WebFlux 等响应式应用中。
- 线程安全: 共享连接,减少连接资源开销。
- 灵活的 API: 提供同步、异步和响应式多种编程范式,满足不同需求。
- 资源利用率高: 减少了线程上下文切换和阻塞。
缺点
- 相较于 Jedis,API 可能稍微复杂一些,学习曲线略陡。
- 对于非常简单的同步操作,性能优势可能不明显,甚至可能因为其复杂的底层机制而略有劣势(但在高并发下优势明显)。
2. Spring Data Redis
在Spring中,提供了Spring Data Redis,其底层默认使用Lettuce,封装了对Redis的操作,并提供RedisTemplate暴露接口。
2.1 添加依赖
首先在pom.xml文件中添加以下依赖:
xml
<dependency>
    <groupId>org.springframework.boot</groupId>
    <artifactId>spring-boot-starter-data-redis</artifactId>
</dependency>然后分别介绍SpringBoot连接单机版和集群版Redis。
2.2 单机版
在application.yml中配置如下:
yaml
spring:
  data:
    redis:
      host: 127.0.0.1    # Redis 服务器地址
      port: 6379         # Redis 服务器端口
      database: 0        # Redis 数据库索引 (默认为0)
      password: 123456   # Redis 连接密码 (如果没有密码,可以不配置或留空)
      timeout: 5000ms    # 读超时时间 (毫秒)
      # 以下是连接池配置(Lettuce 默认使用连接池)
      lettuce:
        pool:
          max-active: 8
          max-idle: 8
          min-idle: 0
max-wait: -1ms # 等待连接池的连接的超时时间 (毫秒),-1表示无限等待在业务代码中使用RedisTemplate:
java
@RestController
public class RedisTestController {
private static final String ORDER_PREFIX = "ord:";
@Resource
private RedisTemplate redisTemplate;
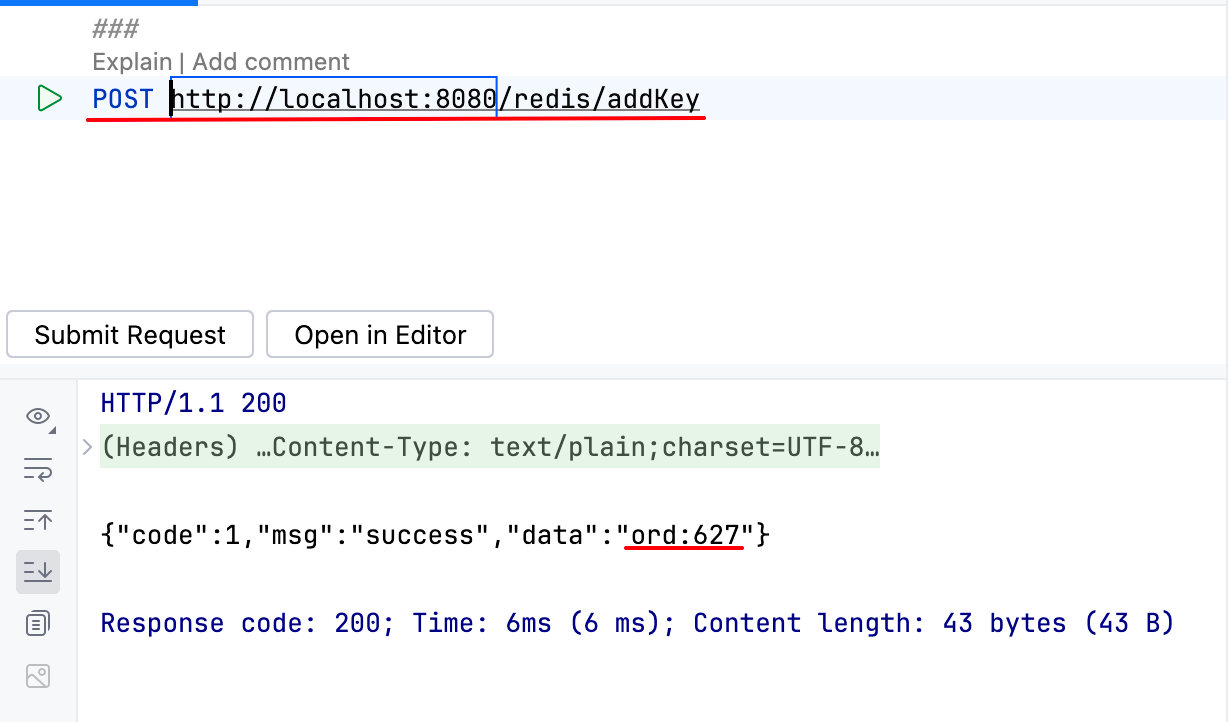
@PostMapping("/redis/addKey")
public String addKey(){
int index = ThreadLocalRandom.current().nextInt(1000) + 1;
String key = ORDER_PREFIX + index;
String value = UUID.randomUUID().toString();
redisTemplate.opsForValue().set(key, value);
return key;
}
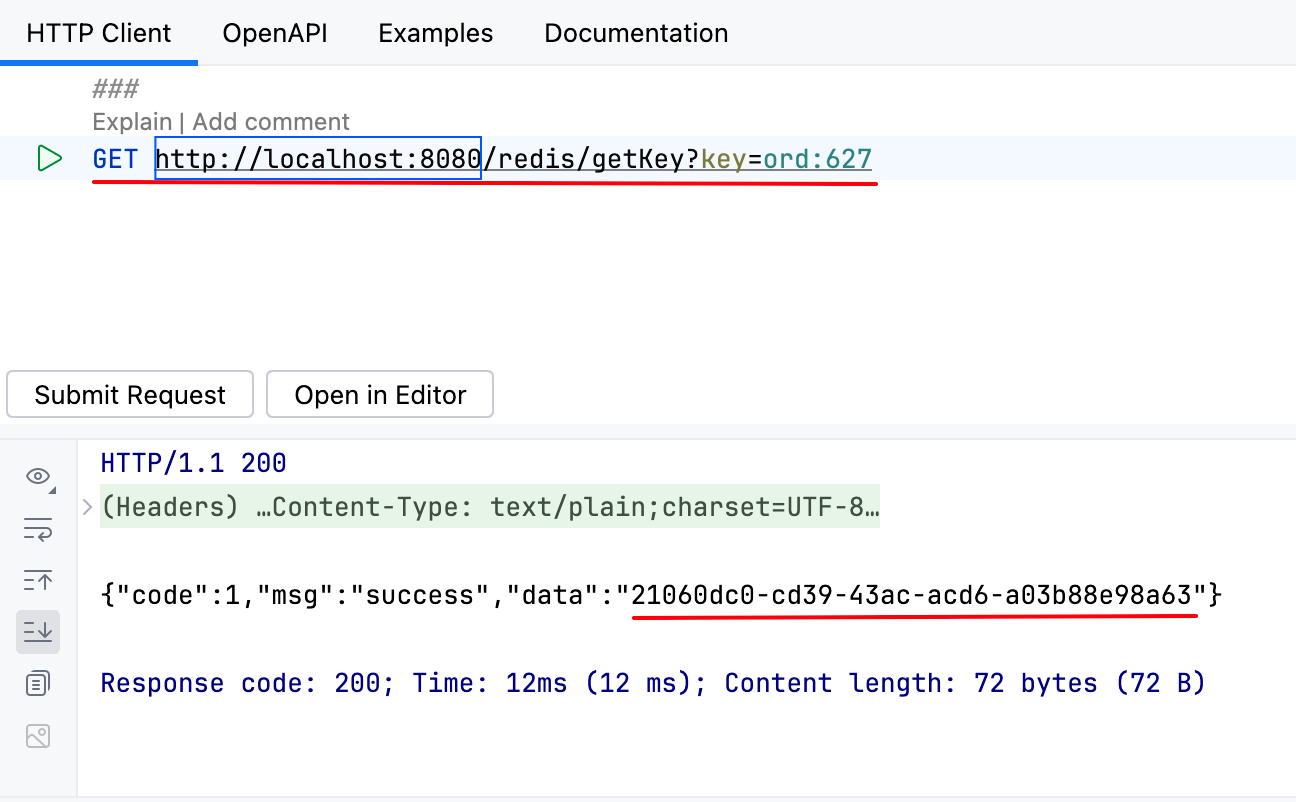
@GetMapping("/redis/getKey")
public String getValue(@RequestParam String key){
return (String) redisTemplate.opsForValue().get(key);
}
}测试结果正常:
2.3 单机版问题
当我们使用redis-cli连上Redis服务器后,查看所有的key:
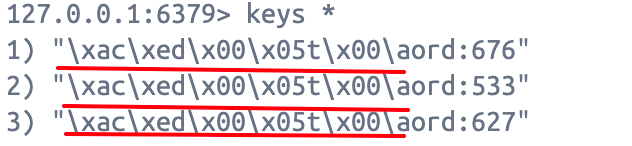
会发现key的前面还有一堆乱码。
这是因为RedisTemplate默认使用 JdkSerializationRedisSerializer 进行序列化/反序列化。
java
@Override
public void afterPropertiesSet() {
super.afterPropertiesSet();
if (defaultSerializer == null) {
解决方法有两个:
使用
StringRedisTemplate:StringRedisTemplate继承自RedisTemplate,默认使用StringRedisSerializer,这意味着 key 和 value 都会以字符串形式存储,方便在 Redis 客户端中直接查看。推荐在大多数情况下使用StringRedisTemplate。java@Resource private StringRedisTemplate stringRedisTemplate;自定义
RedisTemoplate的序列化器:在配置类中,自定义RedisTemplate,修改序列化方式。java@Configuration public class RedisConfig { @Bean public RedisTemplate<String, Object> redisTemplate(RedisConnectionFactory factory, ObjectMapper objectMapper) { RedisTemplate<String, Object> template = new RedisTemplate<>(); template.setConnectionFactory(factory); // 使用 Jackson2JsonRedisSerializer 来序列化和反序列化 redis 的 value 值 Jackson2JsonRedisSerializer jackson2JsonRedisSerializer = new Jackson2JsonRedisSerializer(objectMapper, Object.class); // 使用 StringRedisSerializer 来序列化和反序列化 redis 的 key 值 StringRedisSerializer stringRedisSerializer = new StringRedisSerializer(); // key 采用 String 的序列化方式 template.setKeySerializer(stringRedisSerializer); // hash 的 key 采用 String 的序列化方式 template.setHashKeySerializer(stringRedisSerializer); // value 采用 jackson 的序列化方式 template.setValueSerializer(jackson2JsonRedisSerializer); // hash 的 value 采用 jackson 的序列化方式 template.setHashValueSerializer(jackson2JsonRedisSerializer); template.afterPropertiesSet(); return template; } }
2.4 集群版
集群版配置如下:
yaml
spring:
  data:
    redis:
      cluster:
        # Redis 集群节点列表
        nodes: 10.10.83.96:6380,10.10.83.96:6381,10.10.83.96:6382,10.10.83.96:6383,10.10.83.96:6384,10.10.83.96:6385
        # 最大重定向次数 (集群模式下可能需要)
        max-redirects: 3
      password: 123456   # Redis 连接密码 (如果没有密码,可以不配置或留空)
      timeout: 5000ms    # 读超时时间 (毫秒)
      # 以下是连接池配置(Lettuce 默认使用连接池)
      lettuce:
        pool:
          max-active: 8
          max-idle: 8
          min-idle: 0
max-wait: -1ms # 等待连接池的连接的超时时间 (毫秒),-1表示无限等待不用改动业务代码,便可以直接使用,但是会有问题,请看下面章节。
2.5 集群版问题
2.5.1 为什么集群节点IP地址是10.10.83.96?
在单机版时,Redis地址是127.0.0.1,为什么集群版时IP地址变成了10.10.83.96?
假设我们使用127.0.0.1,如下:
yaml
spring:
  data:
    redis:
      cluster:
        # Redis 集群节点列表
        nodes: 127.0.0.1:6380,127.0.0.1:6381,127.0.0.1:6382,127.0.0.1:6383,127.0.0.1:6384,127.0.0.1:6385
...访问Redis集群时,会报如下错误:
DANGER
org.springframework.data.redis.RedisConnectionFailureException: Redis connection failed
更具体的错误如下:
txt
Unable to connect to [172.19.0.7/<unresolved>:6379]: java.nio.channels.ClosedChannelException
Unable to connect to [172.19.0.2/<unresolved>:6379]: java.nio.channels.ClosedChannelException
Unable to connect to [172.19.0.4/<unresolved>:6379]: java.nio.channels.ClosedChannelException
Unable to connect to [172.19.0.3/<unresolved>:6379]: java.nio.channels.ClosedChannelException
Unable to connect to [172.19.0.6/<unresolved>:6379]: java.nio.channels.ClosedChannelException
Unable to connect to [172.19.0.5/<unresolved>:6379]: java.nio.channels.ClosedChannelException172.19.0.*这些IP地址是什么?由于Redis是在Docker容器中启动,并且这些容器都加入了同一个网络redis-net,所以172.19.0.*这些是redis-net的内网地址,默认情况下,Redis 节点会自动检测自己的 IP 地址并用于集群内部通信,并且nodes.conf文件中记载了集群节点的位置:

对于Spring Boot应用程序来说:
- 首先通过
127.0.0.1:6380(选择集群中其中一个地址)访问集群节点,由于Docker做了端口映射,此时可以正常访问,但是,此时Redis节点告诉客户端,请使用172.19.0.*:port访问集群; - 由于Spring Boot程序无法访问
172.19.0.*地址,所以导致无法连接集群;
问题就出在,应该以哪个地址访问到Docker中的Redis集群?
假设现在Spring Boot程序部署在另一台机器上,不能使用127.0.0.1,那应该使用Redis集群所在机器的IP地址。
通过以下命令查看IP地址:
bash
ifconfig
所以,在Spring Boot程序配置文件中,应该使用10.10.83.96这个IP地址。
当我们改了之后,发现程序仍然有问题,为什么呢?因为Redis节点告诉客户端,请使用172.19.0.*:port访问集群。根本原因在于Redis自动检测到的IP地址是不可用的,此时应该自定义一个外部网络可以访问到的IP地址。
在redis.conf下增加如下配置(示例):
txt
# docker所在的宿主机IP地址
cluster-announce-ip 10.10.83.96
# docker所在的宿主机服务映射端口
cluster-announce-port 6380
# docker所在的宿主机总线映射端口
cluster-announce-bus-port 16380上面配置有两个作用:
- 告诉客户端,请使用
10.10.83.96:6380来访问Redis服务; - 告诉集群中的其他节点,请使用
10.10.83.96:16380来访问集群信息;
所以,我们需要重新创建集群,见附录。
2.5.2 无法感知集群主节点下线
我们开启Spring Boot程序,然后手动关闭集群中的主节点。
可以看到,Redis集群自动完成了故障恢复:
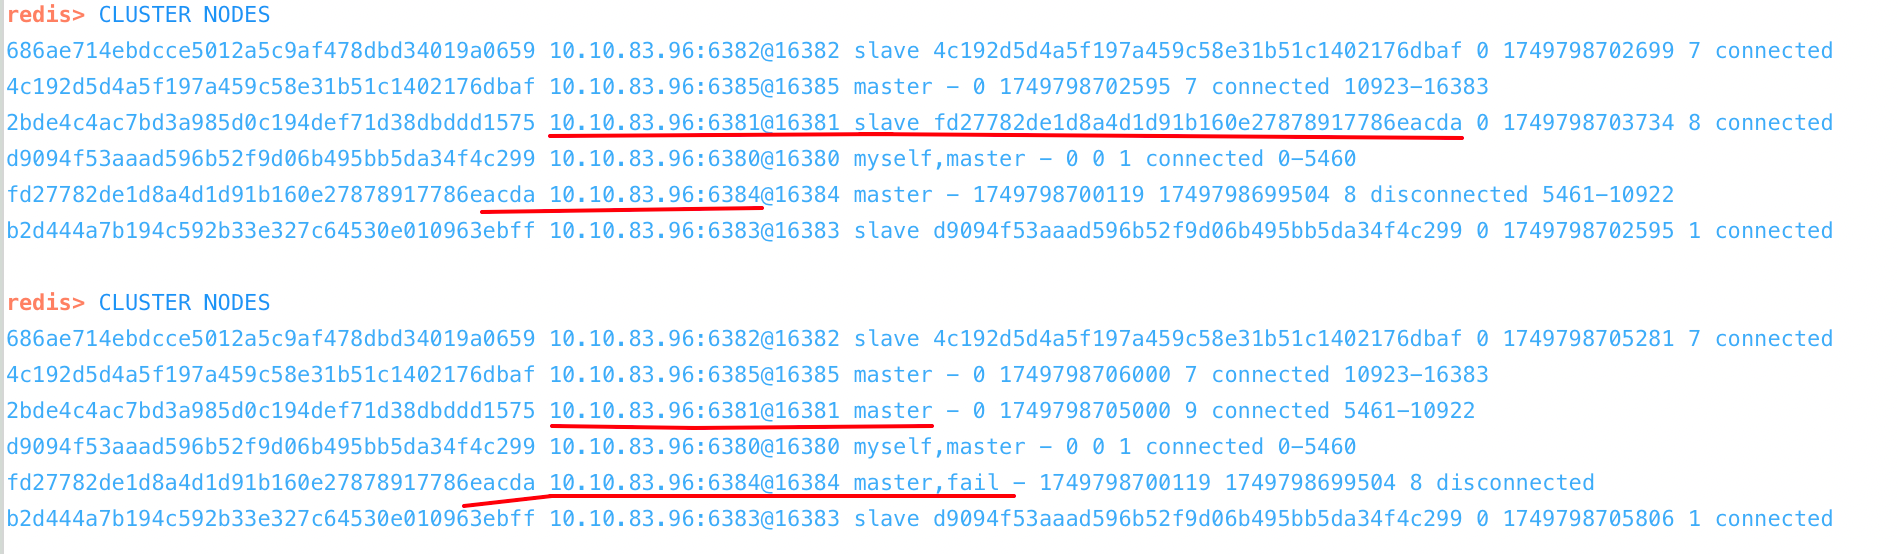
但是,我们再多次调用Spring Boot接口,会发现有以下问题出现:
DANGER
Unable to connect to [10.10.83.96/<unresolved>:6384]: Connection refused: /10.10.83.96:6384
这是由于Spring Data Redis(底层的Lettuce) 无法感知到Redis集群的拓扑结构已发生了变化,仍然认为6384这个主节点还存活,所以照常访问。
解决方案是配置Lettuce定时刷新,获取集群拓扑结构:
yaml
spring:
  data:
    redis:
      lettuce:
        cluster:
          refresh:
          	# 开启自动刷新
            adaptive: true
            # 自动刷新时间间隔
period: 2000ms附录
docker-compose.yml
yaml
name: redis-cluster

services:
  redis6380:
    image: redis:7.4.4
    container_name: redis6380
    ports:
      - "6380:6379"
      - "16380:16379"
    volumes:
      - ./redis6380/conf:/usr/local/etc/redis
      - ./redis6380/data:/data
    networks:
      - redis-net
    command: redis-server /usr/local/etc/redis/redis.conf

  redis6381:
    image: redis:7.4.4
    container_name: redis6381
    ports:
      - "6381:6379"
      - "16381:16379"
    volumes:
      - ./redis6381/conf:/usr/local/etc/redis
      - ./redis6381/data:/data
    networks:
      - redis-net
    command: redis-server /usr/local/etc/redis/redis.conf

  redis6382:
    image: redis:7.4.4
    container_name: redis6382
    ports:
      - "6382:6379"
      - "16382:16379"
    volumes:
      - ./redis6382/conf:/usr/local/etc/redis
      - ./redis6382/data:/data
    networks:
      - redis-net
    command: redis-server /usr/local/etc/redis/redis.conf

  redis6383:
    image: redis:7.4.4
    container_name: redis6383
    ports:
      - "6383:6379"
      - "16383:16379"
    volumes:
      - ./redis6383/conf:/usr/local/etc/redis
      - ./redis6383/data:/data
    networks:
      - redis-net
    command: redis-server /usr/local/etc/redis/redis.conf

  redis6384:
    image: redis:7.4.4
    container_name: redis6384
    ports:
      - "6384:6379"
      - "16384:16379"
    volumes:
      - ./redis6384/conf:/usr/local/etc/redis
      - ./redis6384/data:/data
    networks:
      - redis-net
    command: redis-server /usr/local/etc/redis/redis.conf

  redis6385:
    image: redis:7.4.4
    container_name: redis6385
    ports:
      - "6385:6379"
      - "16385:16379"
    volumes:
      - ./redis6385/conf:/usr/local/etc/redis
      - ./redis6385/data:/data
    networks:
      - redis-net
    command: redis-server /usr/local/etc/redis/redis.conf

networks:
  redis-net: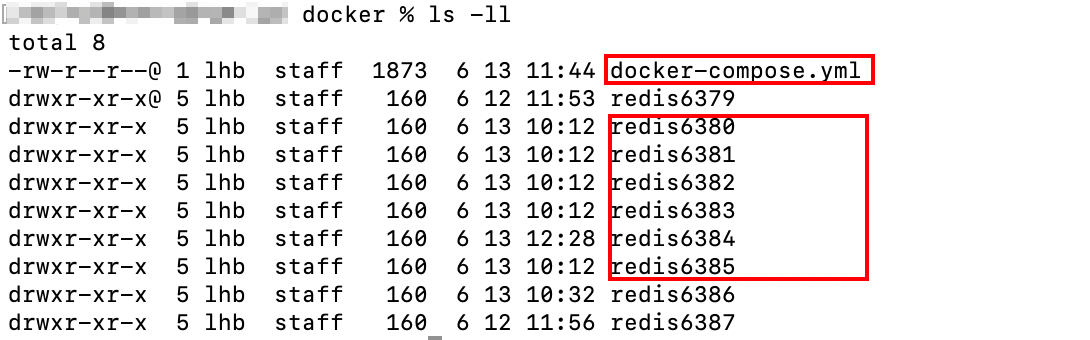
driver: bridgedocker-compose.yml文件位置如下:
redis.conf
txt
port 6379
dir /data/
logfile "redis.log"
requirepass 123456
masterauth 123456
appendonly yes
protected-mode yes
bind 0.0.0.0

cluster-enabled yes
cluster-config-file nodes.conf
cluster-node-timeout 5000

# docker所在的宿主机IP地址
cluster-announce-ip 10.10.83.96
# docker所在的宿主机服务映射端口
# 此处端口从6380到6385,分别对应6个Redis实例
cluster-announce-port 6380
# docker所在的宿主机总线映射端口
# 此处端口从16380到16385,分别对应6个Redis实例
cluster-announce-bus-port 16380启动容器
在 docker-compose.yml所在目录下运行下面的命令:
bash
docker compose up -d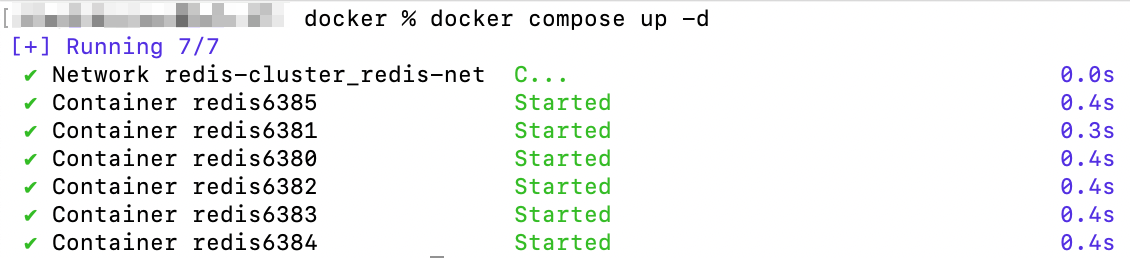
容器启动完成。
create cluster
在容器内或在宿主机内运行如下命令,创建集群:
txt
redis-cli -a 123456 --cluster create 10.10.83.96:6380 10.10.83.96:6381 10.10.83.96:6382 10.10.83.96:6383 10.10.83.96:6384 10.10.83.96:6385 --cluster-replicas 1